

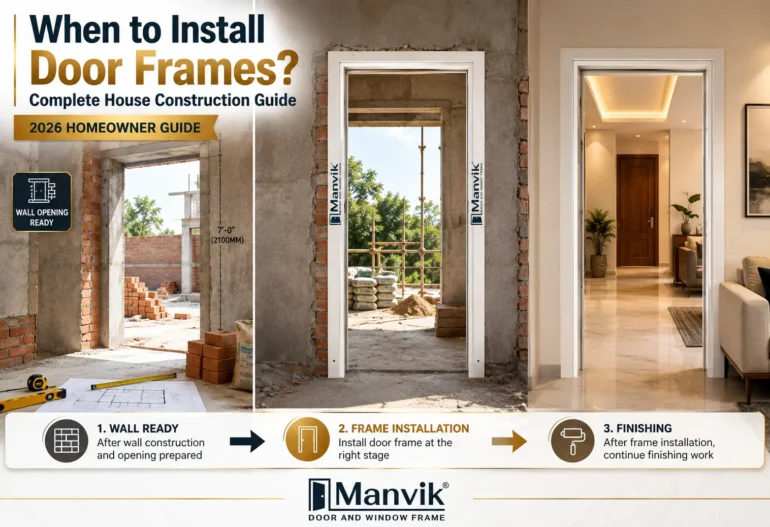
Many homeowners finalize their doors and frames somewhere in the middle of construction but stay confused about the exact point at which the frame should actually go in. Should it be fixed before the walls are plastered? Before the floor is laid? Before the tiles go down in the bathroom? This confusion is common, and getting the timing wrong can lead to misaligned frames, wasted material, or rework that delays the whole project. This guide answers when to install door frames during house construction, stage by stage, so homeowners, builders and contractors can plan the work without guesswork.
Also read:- Weather Resistant Window Frames in India: How PPGI Frames Withstand Extreme Weather (2026)
When to Install Door Frames?
Door frames are generally installed after the walls are built and the door openings are ready, but the exact point — before or after plastering, before or after flooring — depends on the frame type, the wall condition and the contractor’s preferred sequence. In most Indian residential projects, frames go in once brickwork is complete and openings are measured, and the surrounding plaster, flooring and tiling are then finished around the fixed frame.
The right timing for when to install door frames is never a single fixed rule. It shifts based on:
- Door frame type (wood, PPGI, steel)
- Construction method used on site
- Condition and readiness of the wall
- Plastering sequence followed by the mason
- Finished floor level (FFL) planned for the room
- Flooring material thickness (tile, marble, granite, vitrified)
- Tile thickness in wet areas like bathrooms
- The specific frame installation system being used
- Manufacturer’s fitting instructions for that frame
- Site-specific requirements set by the architect or contractor
Because these factors change from project to project, the safest approach is to treat this article as a decision framework rather than a single fixed answer, and to confirm the final sequence with your contractor before work begins.
At What Stage of House Construction Are Door Frames Installed?
The installation of the door frame is typically within the middle of the timeline for construction—when the structure is completed but before construction work is finished. The typical sequence is like this. However, the sequence of steps may vary based on the type of frame that is selected.
- Construction and foundation work, columns, and footings as well as frames for the RCC frame are the first to be completed.
- Brickwork, also known as wall construction: Walls are constructed, leaving door openings at the size and width.
- Doors opening prep The mason cleans the opening, cleans up any loose debris, and ensures that it is level.
- Test of Measurement – The opening of the site is measured and then compared with the schedule for doors.
- Planned floor levels for finished floors The final floor height (FFL) is set so that the frame’s lowest position accounts for the flooring’s thickness.
- Installation of the door frame The frame is put in the opening, following the proper sequence for the particular framework structure (before or following plaster, as explained in the following).
- The process of plastering, also known as wall-finishing The plaster is put on the frame, where it is put in place early or inserted into an opening that has been plastered where the frame is later installed.
- Tile and flooring The flooring is laid in the frame, allowing for the frame’s planned clearance.
- Finishing and painting the walls as well as frames get done or glazed according to the style.
- Installation of door shutters: Shutters are put up once dust-generating activities are mostly finished.
- Hardware Installation: Hinges as well as locks, handles, and closers are installed.
- Final Inspection – The alignment, plumb, level and finish are all checked before handing over.
This is a general guideline and not a set of rules. Certain contractors prefer fixing frames immediately after brickwork, prior to when plaster is applied to the wall, and others will wait until the plastering is complete and then put the frame inside a plastered opening. Both methods are utilized on Indian projects, but choosing the right one for your project will depend on the type of frame and the way your contractor works—and this is the reason this option warrants its own section in the following.
Should Door Frames Be Installed Before or After Plastering?
Answer straight away: Door frames can be put in place before or after the plastering process—both are standard procedures in Indian construction of houses, and the right choice will depend on the type of frame and the method of working used by the mason and the amount of protection required for the frame for the remainder of the construction process.
Installing Door Frames Before Plastering
When the frame is put in immediately after the brickwork has been completed, prior to any plaster being put on, the plaster is then applied flush against the edge of the frame.
- Possibilities of advantages: The frame can serve as a guide for the mason, assisting in keeping the wall’s edge straight close to the opening. It also permits it to be secured directly to the block or brick wall that can provide an extra strong hold to certain frame systems.
- Measurement considerations Since the wall hasn’t been put up with plaster yet, the opening that is measured will be “a “brick opening” and not the “finished opening.” The frame’s width must be adjusted to reflect the thickness of the plaster, which will be applied later on both sides of the wall.
- Wall finalization aspects: The mason needs to be careful when putting down the edges of the frame in order to achieve an even, clean line. This requires some expertise and time than putting up a wall that is open.
- Protection of the frame during construction It is subject to cement splatters and dust as well as scaffolding contact and general site movement over an extended period of the construction project. Therefore, it is required to be covered, generally wrapped or taped, until the final stages are complete.
- Alignment specifications: Plumb and level should be checked and repeated, since the frame remains in place during several other steps of work, in which it may be pushed from its position.
Installing Door Frames After Plastering
The wall is first plastered, then the frame is then inserted to the opening.
- Potential advantages: The opening size is now the final size, which generally results in an accurate, predictable fitting. There’s a lower chance of a plaster splash on the frame.
- Opening measurements that are finished: Measurements are taken from the surface of the wall, which is generally more accurate than measurements taken from rough brickwork, because the the thickness of the plaster can differ across walls.
- Wall thickness precision: Because the plastered opening shows the real wall’s thickness, the frame’s depth is more accurately matched without relying on guesswork about the allowance for plaster.
- Installation factors to consider: The frame is placed later in the timeframe and therefore spends less time in the midst of large construction work that can lower the risk of misalignment or damage before shutters are put in place.
Which Option Is Better?
There isn’t a single right solution for each home. The best choice is based on:
- The particular door frame and the method of fixing it
- The installation system can be designed to work with a raw opening or one that has been finished
- Wall thickness and thickness of plaster is planned for the project
- How precise was the opening constructed during the brickwork
- Instructions for the manufacturer included in the frame
- The typical contractor’s or mason’s routine of work
- Site conditions overall and the project’s timeline
A variety of PPGI frames, as well as factory-made ones, can be used in either of the sequences, but the guidelines of the manufacturer should always be the first priority over any general norm. If you’re unsure, inquire with your contractor which one they’re most comfortable with executing—a method that is carefully executed is generally superior to the “theoretically ideal” method done badly.
Should Door Frames Be Installed Before or After Flooring?
Answer in a direct way: Door frames are usually installed prior to the floor layer being laid, with the frame’s lowest location planned to coincide with the final floor’s level so that the floor can then be laid all the way to the frame with no gaps or cutting.
The timing of flooring matters since the floor of the door frame needs to be placed at or close to the floor’s finished level (FFL), which is the level that the floor surface will attain once tiles or marble, granite, or other materials are laid and installed. Making this mistake is among the main reasons for rework in Indian homes. Important factors to take into consideration:
- Floor level that is finished (FFL): This is the height that will be planned for the finished floor surface including the flooring material as well as the mattress layer underneath it. It is not the actual RCC slab.
- The thickness of the tile: Standard ceramic or vitrified tiles generally have the thickness of a mortar bed. This combined height has to be accounted for within the frame.
- Thickness of marble: Stone slabs of marble, together with the bedding layers, generally are slightly different from tile. Therefore, frame planning should reflect the specific material you choose.
- Granite thickness: As with marble, granite also has its own bed requirements and thickness, which determines the floor’s final height.
- Different flooring types: Wooden flooring, vinyl, or any other finish all have different buildup heights which must be discussed by the flooring contractor.
- Doors shutter clearance When the floor has been completed, there has to be a tiny and deliberate gap between the bottom edge of the shutter and the floor in order to ensure seamless shutting and opening.
- Bottom positioning of the frame: The frame should be secured by adjusting its bottom edge to the FFL and the clearance that the shutter of the door will require and not below levels of the floor slab.
Checklist prior to flooring work beginning:
- Check the floor’s finished height for each room, as it may differ between rooms (bathrooms typically have lower levels).
- Verify the flooring material as well as its total thickness.
- Make sure to share the FFL with the person working on the installation of your frame before the actual installation.
- Verify that the frame’s bottom is set to the proper level, not “close enough.”
- Keep the shutter clearance you have planned in mind while your frame gets put in place.
- Do not finish flooring in the room until the frame location for the area is confirmed.
Should Door Frames Be Installed Before Tiling?
The common-sense answer is that the frame installation schedule must be scheduled around the tile installation, since the thickness of tiles directly influences the final flooring level at the doorway. But different rooms carry different tiling considerations.
Bathroom Door Frames
The floors of bathrooms in Indian homes are typically placed slightly lower than the other rooms in order to regulate drainage and to prevent it from leaking into adjacent rooms. This means that the frame of the bathroom door’s lowest position as well as the material of the frame itself is required to take into account the difference in level and water exposure at the threshold.
Kitchen Door Frames
Kitchens typically have a distinct flooring material or an elevated platform, and the frame’s location must reflect the kitchen’s flooring level, instead of assuming that it is in line with the living areas adjacent to it.
Interior Door Frames
For living rooms, bedrooms and other areas that are not dry The flooring is generally continuous and has a uniform FFL. Therefore, frame planning is easier, but it must be verified against the flooring material that is chosen for the flooring.
In all three scenarios the thickness of tiles, the completed wall’s level at the opening, and the flooring height of that particular room must be verified with the site team prior to the frame being made, particularly in areas that are prone to moisture where a threshold that is incorrect could lead to the water seeping later on.
When Should You Measure Door Openings Before Installing a Door Frame?
Answer in a direct way: Door openings should be measured after walls are constructed and the plaster stage for your selected sequence is completed and then again after the framework is either ordered or fixed, as the conditions on the site can change in the course of construction.
A precise measurement is crucial, as a door that isn’t in line with the opening actually opening can cause gaps and instability. It can also cost you modifications on site. Measurements should take into account:
- The width of the opening is measured at multiple points, as brick openings aren’t always uniform.
- The opening height (measured from the floor’s finish and not from the slab; therefore, the thickness of the flooring is already taken into consideration.
- Wall thickness can affect the thickness of the frame that is required.
- Thickness of plaster must be added or taken into account based upon whether the measurement is taken prior to or after the application of plaster.
- The floor is finished—verified with the flooring plan of this particular room.
- The thickness of the flooring—tile, granite, marble, or tile plus bedding.
- Thickness of tiles is particularly important in kitchens and bathrooms.
- Door shutter specifications The size of the shutter should be matched to the frame’s rebate.
- Direction of opening the door—whether the door swings inward or outward and what side the hinges rest on.
Checklist: Confirm Before Ordering a Door Frame
- Opening wide
- Opening height
- Wall thickness
- Floor level that is finished
- Flooring thickness
- Plaster thickness
- The thickness of the tile (where appropriate)
- Door opening direction
- Door shutter size
- Hardware requirements
What Work Should Be Completed Before Installing Door Frames?
Before putting the frame in, it’s important to verify that the floor is in fact ready instead of thinking that it is. A practical pre-installation checklist:
- Construction of the wall is completed at the time of opening, and there is the construction of a complete wall, with no bricks or block construction work to be done.
- The preparation for opening the door is completed by making debris edges fairly even.
- The opening measurements are verified with the door schedule and not merely based on the diagram.
- Alignment of the wall close to the opening is verified to ensure plumbness.
- The floor plan for this room has been completed even if the flooring isn’t in the process of being laid.
- The thickness of the flooring of the material chosen is communicated to the contractor.
- The planning of the plaster frame, which will go in prior to or after the application of plaster, was established and is sent to the mason and frame installation.
- Tile design for areas with water is well understood specifically for kitchen and bathroom thresholds.
- The plumbing considerations close to the opening (pipes that run near the doorway to the bathroom, for instance) are inspected to ensure that they do not affect the frame fixing.
- Considerations for electrical wiring Nearby conduits or switch boxes shouldn’t block frames’ anchoring points.
- Frame inspection prior to installation Make sure to check the frame for any damage caused by shipping, proper size, and squareness prior to fixing it in the correct position.
Also read:– Door frame manufacturer in India
When Should You Order Door Frames for a New House?
Answer in a direct way: Door frames should generally be ordered when construction of the walls is sufficiently ahead that opening dimensions are able to be confirmed and in a timeframe that the manufacturing and delivery process doesn’t hinder the installation stage of your plan.
In the event of ordering too early, you could end up with mismatched sizes, especially if the openings on your site alter slight in the course of construction. When you order too late, you could delay the entire process as you wait for the frames to be delivered. An effective strategy:
- Finish door dimensions in your architectural drawings. Verify them when brickwork is completed.
- Find openings on the site rather than relying on drawings, as actual construction could differ from the paper drawings by a tiny margin.
- Select what material to frame wood, PPGI or a different option, during the initial design phase because this will affect both the budget and the fix method that is used later.
- Choose PPGI frame doors If you are looking for an industrially finished, non-welding option that is suitable for contemporary builders and residential projects.
- Check custom dimensions for openings not in standard sizes bathroom doors with smaller thresholds, or with wider doorways for entryways.
- Coordinate production and project plan together with the supplier when measurements are set.
- The delivery schedule should be planned in line with your current construction schedule, so that the frames arrive at the time your site is in good enough condition to put them in place not weeks prior or after.
- Coordinate with the schedule of construction in general because flooring, plastering, and painting are all dependent on the frame placed at the correct position.
There is no one “correct week” to place your order. It depends on the way the construction schedule for your project is developing. It’s best to place your order after openings have been confirmed and stable and then to add some time to buffer the frames before you need to actually require the frames in place.
When Should PPGI Door Frames Be Installed?
PPGI is a shorthand as pre-painted galvanized Iron The term PPGI stands for Pre-Painted Galvanized Iron. PPGI door frames are being utilized in new construction throughout India since they are in factory-finished condition, resist termites as well as warping, and don’t need painting on the spot.
The exact time for the installation of the PPGI door frame is determined by many of the same elements that have been discussed previously for door frames in general:
- Site ready The wall structure that is located at the opening must be completed before installing.
- Affordable openings for walls—PPGI frames are generally made according to exact dimensions, which means the opening on the wall must exactly match.
- Wall thickness—verified beforehand, since PPGI frames are typically made to fit a particular wall thickness.
- The floor is now finished As with all door frames, the lowest position is determined by the FFL of the room.
- Planning for flooring tile thickness, granite, or marble must be determined prior to the final placement.
- The sequence of plastering Some PPGI systems are made to be used prior to the plastering process, while others require it after; this is contingent on the particular design of the product.
- Frame assembly system (also known as PPGI frames) PPGI frames typically employ rivet technology or welding-free fixing techniques instead of welding as a standard procedure, which could affect the best frame installation process.
- Manufacturer’s guidelines The manufacturer’s appropriate instructions for that specific PPGI frame should be used to guide how to create the sequence.
Since PPGI door frame systems differ from one manufacturer to the next, there’s not an installation technique that is applicable to all products available. The most secure method is to follow the particular instructions for installing the frame you’ve purchased and then ensure that your contractor is aware of the order before beginning work.
Step-by-Step Door Frame Installation Process
This is an educational outline of how installation of door frames generally goes on at an Indian residential property. It is recommended to follow the instructions of the manufacturer for installation and the requirements of your project.
- Check the door’s opening for any debris, loose materials, or rough edges.
- Verify the width and height in the frames you’re about to install.
- Verify wall thickness to verify that the frame’s thickness is sufficient.
- Confirm the floor’s level so that the frame’s bottom is in the correct position.
- Plan the flooring thickness prior to finalizing the frame’s vertical location.
- Place the door frame inside the opening.
- Check the plumb as well as the level on both vertical jambs as well as on the horizontal head.
- Frames are secured in accordance with the installation process using anchors, fasteners, or rivet-based fixings based on the specific product.
- Verify alignment after fixing, as fixing may cause the frame to shift.
- Complete wall finishing—plaster, putty, or paint, based on the order you select.
- Install the shutter for the door at the right phase of your project (see this section).
- Hardware installation hinges, locks, handles, and a closer.
- Perform a final examination to ensure that the alignment is smooth and the quality of finish.
Door Frame Installation Before vs After Plastering
| Factor | Before Plastering | After Plastering |
|---|---|---|
| Opening measurement basis | Raw brick opening (plaster allowance must be added) | Finished plastered opening (more direct measurement) |
| Wall finishing | Mason plasters around a fixed frame; needs careful edge work | Wall is finished first; frame fits into a completed opening |
| Installation accuracy | Depends on correctly anticipating plaster thickness | Generally more predictable, since the true opening is known |
| Frame protection required | Longer exposure to site work; needs more protection | Shorter exposure; less risk of damage before finishing |
| Alignment stability | Frame present through more construction stages; recheck needed | Fewer disruptive stages left after fixing |
| Site coordination | Requires close coordination between mason and frame installer | Requires accurate plaster work before frame fitting |
| Suitability | Common with some traditional fixing methods and certain frame systems | Common with several factory-made and PPGI frame systems |
Neither column is universally “better” — the right choice depends on the frame type, the manufacturer’s guidance, and what your contractor executes most reliably.
How Flooring, Plastering and Wall Thickness Affect Door Frame Installation
If you’re a first-time homebuyer, these terms can be a bit jarring So here’s a simple description of how they work:
- Floor level that is finished (FFL): The ceiling that the floor will reach when the flooring is completed This is the point of reference for the location where the bottom of a door frame should be.
- Thickness of the flooring It is the height that is a combination of flooring as well as its bedding layer. The homeowner who is planning to install tiles or marble floors must be sure to confirm the thickness before deciding the vertical location for the frame of their door because guessing is among the most frequent reasons for frames that are too high or low.
- The thickness of tiles: Specifically relevant in kitchens and bathrooms in which the tile buildup may differ in comparison to the remainder of your home.
- The thickness of plaster: A layer of plaster that is applied to block or brick walls that alters the size of the opening (if determined prior to the application of the plaster) as well as the depth of the frame that must be able to fit in line with the wall.
- Wall thickness: It is the total thickness of a wall being constructed that determines how thick the door frame must be to ensure it is in a straight line on both sides of the wall.
- Level of the wall that has been finished: The final wall surface has been painted and plastered on the wall. The frame’s edge must align neatly.
- The door shutter’s clearance is this small opening intentionally left between the bottom of the shutters and the floor, allowing the door to is able to move freely without being dragged.
- Frame position: The end result is by combining all the above details of the frame’s precise position within three dimensions (width and height as well as depth) inside an opening in the wall.
Making sure you get these numbers correct before the frame is put in place will avoid the majority of issues that homeowners face in the final stages.
Common Mistakes to Avoid When Installing a Door Frame
- Installation before verifying the floor’s final level usually results in the frame being over or below the floor after flooring is completed.
- Do not take into consideration flooring thickness, particularly when granite or marble is being planned as an alternative to regular tile.
- Incorrectly measuring the opening, usually using only one measurement instead of looking at the width and height from various places.
- Inattention to plaster thickness, which can result in an unfinished frame that isn’t perfectly flush with the wall.
- Incorrectly checking the thickness of the wall and resulting in a wall depth too thin or wide for your wall.
- Installation of the frame without taking a look at the plumb and causing doors to open and close in their own.
- Installation of the frame without checking the level, which can cause gaps that are uneven at the top of the door.
- Utilizing the wrong frame size, which results in the site being trimmed or packed, which can weaken the performance of the installation.
- The frame is installed at an incorrect level typically because you have skipped the floor level test.
- Inattention to the door opening direction, resulting in hinges or clearances being on opposite sides of the frame.
- The frame is damaged during subsequent construction work due to scaffolding dust or improper handling of flooring or plaster.
- not following the installation guidelines of the manufacturer Particularly in the case of PPGI or other frame systems with specific fixation specifications.
- The decision to skip an alignment test at the end of fixing anchors or fasteners, since anchoring could move a frame a bit in the course of installation.
- Poor coordination between trades, for example, flooring contractors, masons, and frame installers not having the same floor-level reference.
When Should Door Shutters Be Installed?
Door frame construction and door shutters are distinct steps, and homeowners may think they occur together. but they don’t.
A doorframe is the structural fixed component that is built in the opening of the wall. Door shutters are the door’s moving panels, which is attached to the frame via hinges. Shutters are typically placed later in the construction when the bulk of the work that generates dust and is prone to impact is done, for various reasons.
- Construction development: Ongoing wall and flooring work could scratch or chip the installed shutter.
- Paint: Painting the walls and frame is typically more straightforward without a shutter blocking the way, but the shutter itself might require an additional finishing.
- Flooring Floors that are installed near the threshold may harm the bottom edge of a shutter even if it’s been hung.
- Internal finishing The false ceiling as well as electrical fittings and other work in the interior could be messier with shutters already installed.
- Protection against destruction: Keeping shutters off-site or safe until later in the project minimizes the possibility of damage from scratching, dents, or moisture damage.
- Hardware Installation: Hinges, locks and handles are usually installed close to handover, after the shutter is up for the last time.
There’s no one universal guideline for when shutters should be lowered depending on the manner in which the project’s final schedule is laid out.
When to Replace Door Frames During Home Renovation
Renovations differ from new construction in that the majority of renovation projects are based on an existing structure that is occupied rather than starting from scratch. The replacement of the door frame during renovations typically includes:
- Doors with damaged frames—termite, rot, warping, rust, or warping (in older frames made of metal) are the most common reasons to replace them.
- The wall repair If the wall surrounding the frame is in need of repair, it’s usually carried out in conjunction with frame replacement instead of before it so that the plaster is not disturbed repeatedly.
- flooring replacement If you’re also modifying the flooring frame, the new frame’s bottom location must be based on the new floor and not around the previous one.
- The replacement of tiles Similar to in the event that kitchen or bathroom tiling is being renovated, the frame’s positioning must reflect the new tile thickness.
- Door shutters that are new are often changed along with the frame, as an old shutter will not fit the frame’s rebate properly.
- Measurements of openings—the current opening must be measured again, as old openings are slightly irregular following years of settlement or prior repairs.
- Frame replacement and removal plans—the removal of an old frame in a safe manner while not damaging the wall is typically the most difficult aspect of a remodel and is something you should discuss with your contractor before you start.
PPGI Door Frames for New House Construction
PPGI door frames are an ideal option for a variety of new projects for residential construction in India, mostly because they’re pre-finished from the factory and don’t depend on welding on-site. Manvik Door Frames works with PPGI (Pre-Painted Galvanized Iron) door frames made with a welding-free design as well as the use of rivets and is made to prevent the weaknesses that welded joints may result in over the course of time. door window frame
These PPGI frames can be used for a variety of different types of projects:
- New homes are being constructed from the ground up
- Residential projects including independent homes
- Apartments with doors that are standard are standard
- Villas with a custom door and opening conditions
- Projects for commercial use that require consistent, factory-finished frames
- Builder specifications for repeat or bulk orders that require several units
- Size requirements for custom sizes for openings that are not standard
If you’re considering the frame materials you’ll need for your new home—wood or PPGI and other metal choices It’s beneficial to understand the details of the way PPGI frames are constructed and how weld-free, rivet-based construction is a part of that.
How to Design Doors Frame Installation with your Contractor or Builder
A brief, focused discussion with your contractor prior to when installation gets underway can help avoid many of the timing concerns that are discussed in this guide. Make use of this checklist as a reference point for the discussion:
- Doors schedule—a listing of each door in the house, including dimensions, locations, and types.
- Sizes of opening are confirmed on the website, not just by drawing.
- Door frame dimensions are compared against the sizes of openings that are confirmed.
- Wall thickness—to be shared with the person providing and fixing frames.
- Completed floor level—verified room-by-room, as it can differ.
- flooring material: tiles or marble, granite, or a different finish.
- Thickness of flooring includes that of the bed layer.
- Thickness of plaster and if frames will be put in prior to or after the plastering.
- Bathroom tile needs because wet areas usually have different thresholds and levels.
- Direction of opening the door—inwards, outwards, and on which side the hinges rest on.
- Installing time—negotiated in the construction schedule overall.
- Frame protection following installation—How the frame will be protected or covered for the duration of site maintenance.
Reading this list together with your builder prior making any purchases or installing frames is among the easiest methods to avoid the most common mistakes that are covered in the previous guide
Frequently Asked Questions
Q1. When should door frames be installed during house construction? A. Door frames are generally installed once the wall structure around the opening is complete and the opening has been accurately measured. Whether this happens before or after plastering depends on the frame type and the contractor’s working method. In most cases, frames go in during the mid-construction phase, with flooring, tiling and painting completed around the fixed frame afterward.
Q2. Should door frames be installed before or after flooring? A. Door frames are typically installed before the final flooring layer is laid, with the frame’s bottom position planned to match the finished floor level. This lets flooring be laid right up to the frame without gaps or later trimming. The exact position depends on the flooring material’s thickness, so this should be confirmed before the frame is fixed.
Q3. Should door frames be installed before plastering? A. It can go either way, and both are common practices. Installing before plastering lets the frame guide the mason’s wall edge but requires the frame to be protected through more construction stages. Installing after plastering gives a more accurate finished-opening measurement but means the wall must be finished first. The better choice depends on the frame system and manufacturer instructions.
Q4. What are the common mistakes to avoid when framing a door? A. The most frequent mistakes include skipping the finished floor level check, ignoring flooring or plaster thickness, measuring the opening incorrectly, and not checking plumb and level before securing the frame. Using the wrong frame size and ignoring the door’s opening direction are also common issues that lead to rework later.
Q5. How long does it take to install a door frame? A. Installation time varies depending on the frame type, wall condition, and installation system used, so there’s no single fixed duration that applies to every project. It’s best to ask your contractor or frame supplier for a realistic estimate based on your specific site conditions and the number of frames being installed.
Q6. Can door frames be installed after plastering? A. Yes, many door frame systems, including several factory-made and PPGI frames, are designed to be installed into a finished, plastered opening. This approach often gives a more accurate fit since the true finished opening size is known, but the manufacturer’s specific fitting instructions should always be followed.
Q7. Should door frames be installed before tiles? A. Frame installation is usually planned around the tiling stage rather than happening in a fixed sequence relative to it. Tile thickness affects the finished floor level near the doorway, especially in bathrooms and kitchens, so the frame’s bottom position should be confirmed based on the planned tile buildup before the frame is fixed in place.
Q8. At what stage are door frames fitted in a new house? A. Door frames are typically fitted after the walls are built and door openings are ready, but before flooring, tiling and painting are completed. The exact stage — relative to plastering specifically — depends on the frame type and the contractor’s preferred sequence for that project.
Q9. What should be completed before installing a door frame? A. Wall construction at the opening should be finished, the opening should be measured and verified, and the finished floor level for that room should be decided. It also helps to confirm flooring thickness, plaster thickness, and the door’s opening direction beforehand, so the frame is positioned correctly the first time.
Q10. How do I know the correct height for a door frame? A. The correct height is based on the finished floor level for that room, plus the height needed for the door shutter and its clearance from the floor. This should account for flooring thickness, since measuring from the bare floor slab instead of the finished floor level is one of the most common causes of incorrectly positioned frames.
Q11. Should I measure the door opening before or after plastering? A. Both are valid, but they give different numbers. Measuring before plastering gives you the raw brick opening, so you’ll need to add an allowance for plaster thickness. Measuring after plastering gives you the true finished opening directly. Which one you use depends on whether your frame will be installed before or after the plaster stage.
Q12. How much space should be left for flooring under a door? A. The space needed depends on your specific flooring material and its total buildup thickness, including the bedding layer, plus a small clearance gap for the door shutter to swing freely. This figure isn’t universal — it should be calculated for your chosen flooring material rather than assumed.
Q13. When should bathroom door frames be installed? A. Bathroom door frames are planned around the bathroom’s finished floor level, which is often set slightly lower than the rest of the house for drainage. The frame’s threshold position and material should account for this level difference and for moisture exposure, so this is usually confirmed as part of the tiling and waterproofing plan for that bathroom.
Q14. Should door frames be installed before painting? A. Yes, in most projects the door frame is installed and the surrounding wall is finished before final painting begins, since painting is typically done as one of the last stages. However, some frames, particularly factory pre-finished ones like PPGI frames, arrive already painted and may only need surrounding wall touch-ups rather than fresh painting on the frame itself.
Q15. When should PPGI door frames be installed? A. PPGI door frame installation timing depends on the specific product’s design, the wall’s readiness, and the manufacturer’s fitting instructions, since different PPGI systems use different fixing methods such as rivet technology. As a general rule, the wall opening should be accurately built and measured first, with the exact installation stage confirmed against that particular frame’s installation guidelines.
Planning Door Frames for Your New House?
If you’re finalizing door frame requirements for a new house, an apartment project, or a commercial build, Manvik Door Frames works with PPGI door frames built using weld-free, rivet-based construction, suited to a range of residential and builder requirements. Whether you need custom sizes, bulk quantities for a multi-unit project, or product details before finalizing your door schedule, feel free to reach out to Manvik Door Frames for PPGI door frame information and quotation requests for your project. door window frame in sirsa
Also read:-
weld free door frame manufacturer in India


